# Update old to new Version
### **How to maintain future Updates with Old Version**
***
{% hint style="info" %} Option1:- \ Create a branch and push your current code there. Then download our CodeCanyon project and push it to another branch. In the final step, merge the branches. Conflicts can happen during the merge, so resolve them with care.
{% endhint %}
{% hint style="info" %} option2:- \ Every time we release an update, we send you the changed files, arranged by folders. You’ll have to replace them in your project. But remember, this might conflict with your custom code. If both of us changed the same file, review it closely and merge the updates carefully.
{% endhint %}
{% hint style="warning" %}
Note:
1 Before proceeding, ensure you create a backup, as we are not responsible for any potential loss.
2 Please ensure you follow the same steps separately for each of the three folders: Taxido\_laravel, Taxido\_user, and Taxido\_driver.
3 Do not directly change in your real project it will show errors Regards package name, version and etc.
{% endhint %}
{% hint style="danger" %}
**Warning:** Manual updates to **Taxido** require technical expertise in **React Native**, **Laravel**, **Node.js**, and **Firebase**. Always back up your project and test changes in a staging environment before applying them to production. We are not responsible for any issues or data loss caused by manual updates. Refer to the official documentation for guidance.
{% endhint %}
{% hint style="info" %} **Note:** As per Envato's policy, installation, setup, configuration, upgrades, or modifications are not included in free support. Free support only covers bugs or errors in the original code. Installation and customization assistance are not provided as part of free support.\
\ However, we are providing guidelines on how to update future releases with your existing source code for informational purposes.\
\ **Please do not create support tickets for issues encountered during the update process, as we will not be able to provide support for them.**
{% endhint %}
**Follow below steps on how to update existing source code.**
1. Download **Github Desktop** from url as per your system like MacOs or Windows
2. Now Login in Github Desktop and configure the setup with your github.
3. You have already create your project in Visual Studio.
4. Open Github Desktop, on left hand panel top click on :caret-down:
5. One side menu open in that click on **Add** button
6. On click add button dropdown menu will open in that click on **Create New Repository...**
7. After click create new repository one pop-up will appear in the form add your project name your project path where it is located and click on **Create repository** button
8. After above process you can check in your project there is another folder created with same project name just remove that folder.
9. After above process complete click on **Publish repository**, one confirmation pop-up will appear in that again click on **Publish repository** button
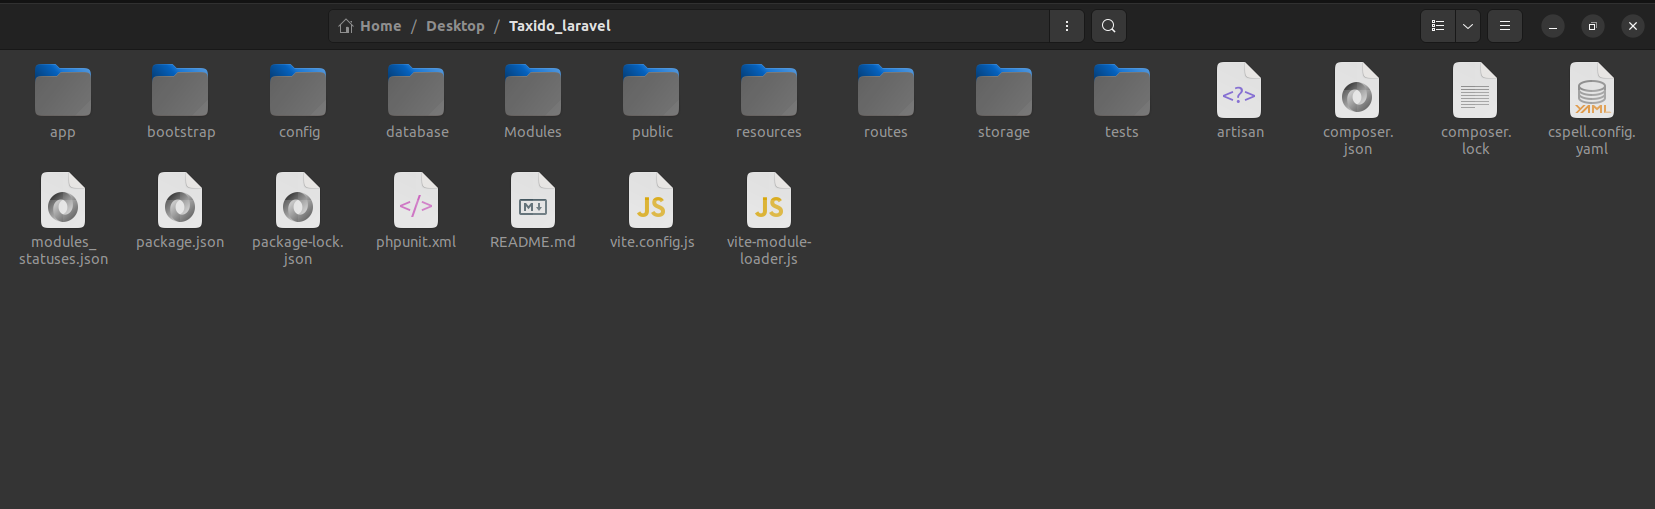
10. Now download project your project Codecanyon, unzip the folder, click on Taxido\_laravel folder, now copy all the files and paste it in your project
11. Now Again go to **Github Desktop** give comment and click on commint on main button.
12. Now click on **Push origin**
13. Click right click on your project name from list and click on **View on Github**.
14. For check open github in google chrome login in your git and check
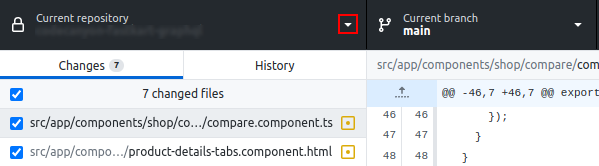
15. Now click on **Changes** for check total number for file changes and which files has been changed.
16. You can see total number of changes and which file has been changed.
17. Every time when ever new update came in project do same process download code unzip folder and paste in your dumy project and push it and go to github and click on changes you can see the in all the files where ever changes happens.
18. Copy the changes one by one and paste it your real project.