# Generate Build APK / AAB

## <img src="https://docs.pixelstrap.net/laravel/taxido/assets/images/apk-icon.jpg" alt="" data-size="line">  **How to build APK or AAB ?**

{% hint style="info" %} <i class="fa-bullhorn">:bullhorn:</i> NOTE : Before launching the app, ensure you have correctly set up the ADMIN LARAVEL and have added all necessary data through the admin panel.<br>
{% endhint %}

## 1. Android&#x20;

### <img src="https://docs.pixelstrap.net/laravel/taxido/assets/images/apk-icon.jpg" alt="" data-size="line">  **Build APK Using Android Studio :**

1. Open Android Studio and navigate to the Android folder.<br>

2. Give the Gradle build process enough time to finish.<br>

   <figure><img src="https://74030740-files.gitbook.io/~/files/v0/b/gitbook-x-prod.appspot.com/o/spaces%2F6o4UzjBZtMQpeq4oeh8s%2Fuploads%2F4PChDh34rSBrbmW7z1B1%2Fimage.png?alt=media&#x26;token=93489237-bfe3-4a80-89d6-bee8046fe0ec" alt=""><figcaption></figcaption></figure>

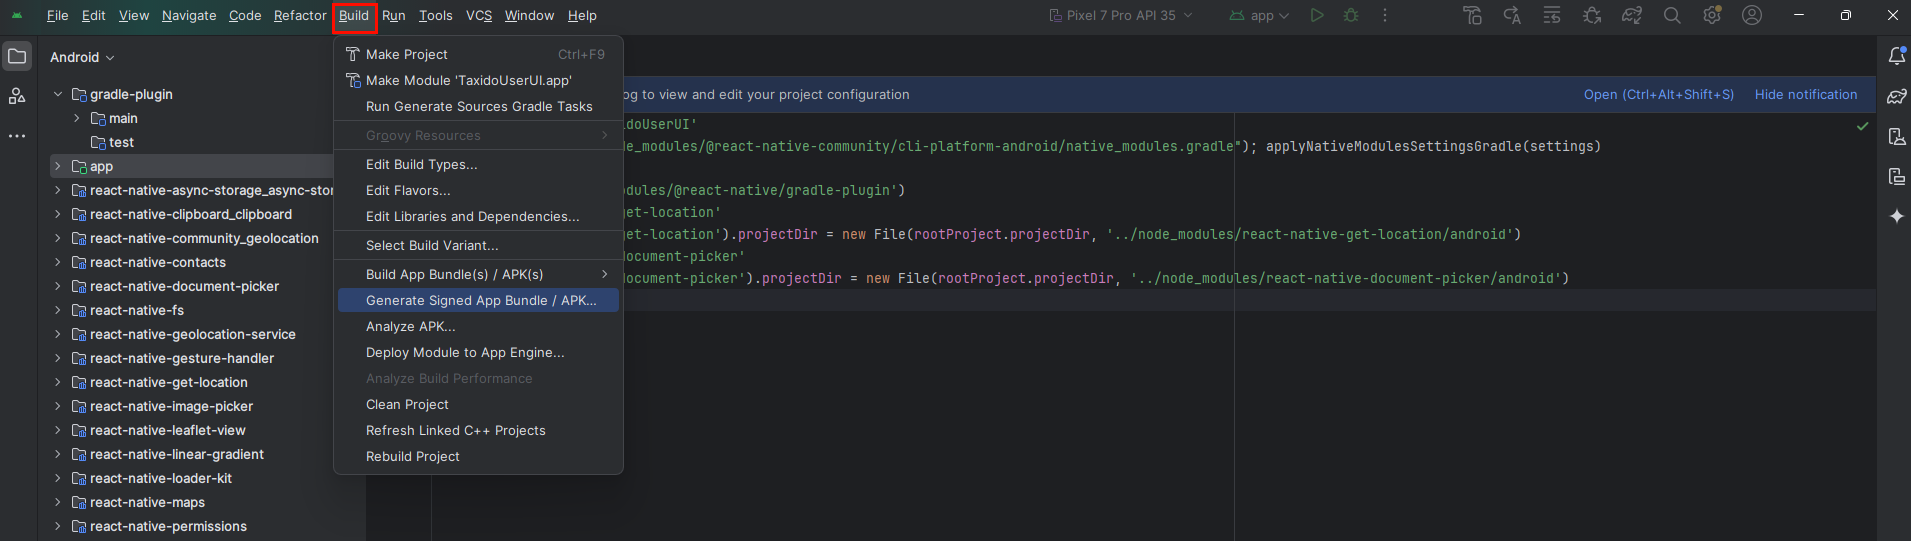
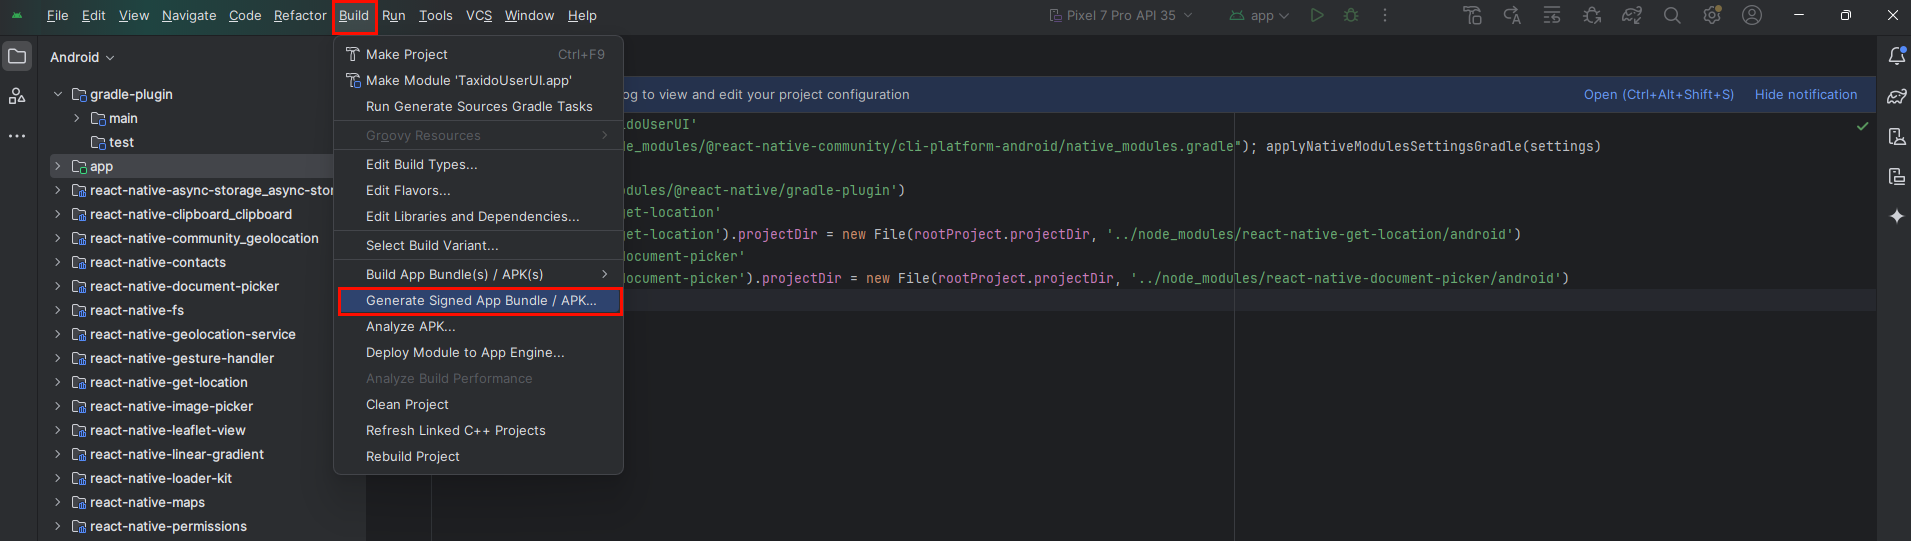
3. From the menu bar at the top, choose "Build."<br>

   <figure><img src="https://74030740-files.gitbook.io/~/files/v0/b/gitbook-x-prod.appspot.com/o/spaces%2F6o4UzjBZtMQpeq4oeh8s%2Fuploads%2F5OBoNAu7qVSKh4xt5QPZ%2Fimage.png?alt=media&#x26;token=3516ef28-d032-4be7-8530-5735e5bd8bdc" alt=""><figcaption></figcaption></figure>

4. Next, choose "Generate Signed Bundle / APK" from the options.<br>

   <figure><img src="https://74030740-files.gitbook.io/~/files/v0/b/gitbook-x-prod.appspot.com/o/spaces%2F6o4UzjBZtMQpeq4oeh8s%2Fuploads%2FGT3X5nNoSg7dIhDIF0bO%2Fimage.png?alt=media&#x26;token=f80d1368-460c-4c5c-8c04-5d46bfa6dd4a" alt=""><figcaption></figcaption></figure>

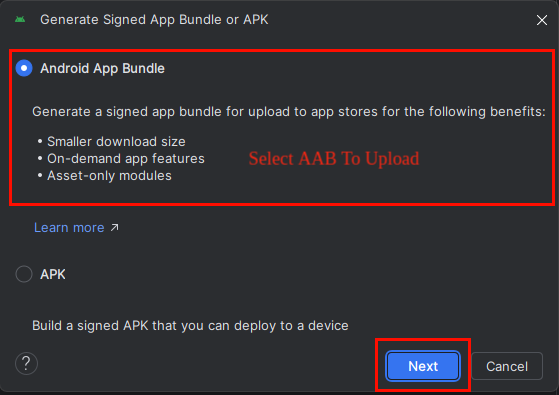
5. Select Android App Bundle (AAB) for posting to the Google Play Store and APK for testing your app.<br>

6. After choosing an option, click the 'Next' button.<br>

   <figure><img src="https://74030740-files.gitbook.io/~/files/v0/b/gitbook-x-prod.appspot.com/o/spaces%2F6o4UzjBZtMQpeq4oeh8s%2Fuploads%2FZmpJsOe2CpgWYA1mvkuo%2Fimage.png?alt=media&#x26;token=e2c44bdf-3f12-4c54-9117-39c700c8720b" alt=""><figcaption></figcaption></figure>

   <figure><img src="https://74030740-files.gitbook.io/~/files/v0/b/gitbook-x-prod.appspot.com/o/spaces%2F6o4UzjBZtMQpeq4oeh8s%2Fuploads%2F012yNjqGBki3MC0S5zYl%2Fimage.png?alt=media&#x26;token=7692ee19-79a7-4151-a9f0-5913673decf1" alt=""><figcaption></figcaption></figure>

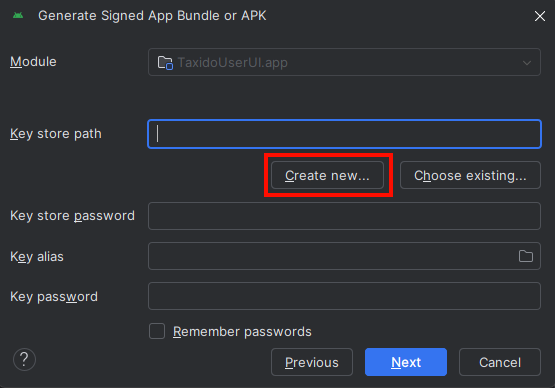
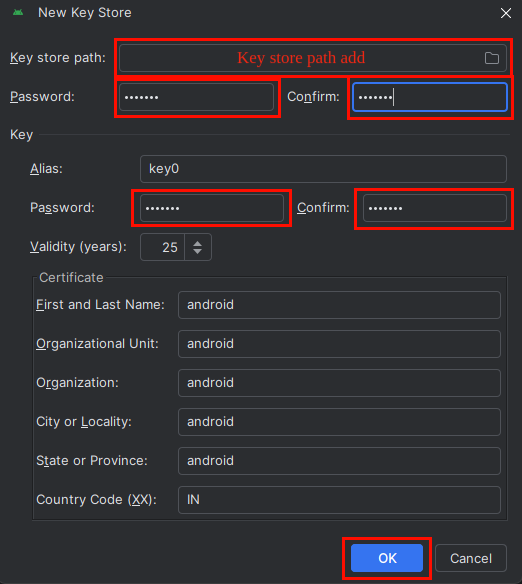
7. If you don't already have a key store, click on "Create New" to set one up.\
   \ <i class="fa-bullhorn">:bullhorn:</i> <mark style="color:$warning;">NOTE :</mark>\ <mark style="color:$warning;">Your keystore is essential when uploading your AAB to the Play Store. It is a one-time use; if you upload your app using a particular keystore and then lose it, you won't be able to upload your AAB again with a new keystore.</mark>\
   \ <i class="fa-bullhorn">:bullhorn:</i> <mark style="color:$warning;">**NOTE :**</mark>\ <mark style="color:$warning;">**Ensure you remember your alias name and password, as they are required to generate the SHA key for the release.**</mark><br>

   <figure><img src="https://74030740-files.gitbook.io/~/files/v0/b/gitbook-x-prod.appspot.com/o/spaces%2F6o4UzjBZtMQpeq4oeh8s%2Fuploads%2FXhCajXS1rGIY2LXMxRYt%2Fimage.png?alt=media&#x26;token=f74d4230-2311-426a-8a39-2a0a8c808727" alt=""><figcaption></figcaption></figure>

8. Specify the location where you want to save the keystore, enter the keystore password, choose an alias name and alias password, and then click the OK button.<br>

   <figure><img src="https://74030740-files.gitbook.io/~/files/v0/b/gitbook-x-prod.appspot.com/o/spaces%2F6o4UzjBZtMQpeq4oeh8s%2Fuploads%2FMdbfTl4YB0dVpBzmEP9O%2Fimage.png?alt=media&#x26;token=ad2e4b51-c458-479e-bd90-60bca6964e4a" alt=""><figcaption></figcaption></figure>

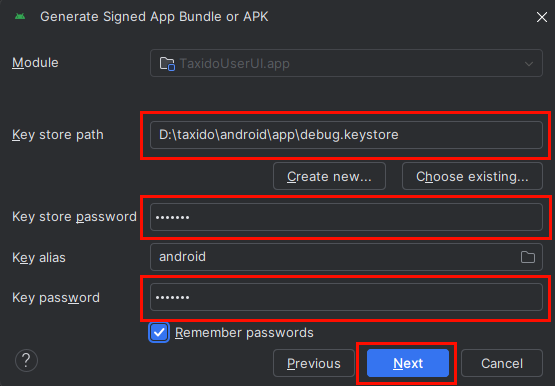
9. If you’ve already created a keystore, simply choose the file path, enter the alias name and password, and then click the Next button.<br>

   <figure><img src="https://74030740-files.gitbook.io/~/files/v0/b/gitbook-x-prod.appspot.com/o/spaces%2F6o4UzjBZtMQpeq4oeh8s%2Fuploads%2FNnUbNjzZPcoL3i7LkHlK%2Fimage.png?alt=media&#x26;token=af130ed1-ffb7-483e-8965-3874287a8f6b" alt=""><figcaption></figcaption></figure>

10. Click "Create" after selecting "Release" from the Build Variants menu.<br>

    <figure><img src="https://74030740-files.gitbook.io/~/files/v0/b/gitbook-x-prod.appspot.com/o/spaces%2F6o4UzjBZtMQpeq4oeh8s%2Fuploads%2FfwV3A1J3i8vLfpvbJGyi%2Fimage.png?alt=media&#x26;token=53660d04-dc5d-440e-93ba-a915e4e86a42" alt=""><figcaption></figcaption></figure>

11. It may take a moment for the APK to be generated. Once it's ready, you can find it located in the bottom right corner.

### <img src="https://docs.pixelstrap.net/laravel/taxido/assets/images/apk-icon.jpg" alt="" data-size="line"> **Build APK Using Terminal :**

1. **Open Terminal in Visual Studio Code**<br>
   1. Open Terminal in Visual Studio Code.<br>
   2. Open the terminal in VS Code by pressing:<br>
      1. Ctrl + \` (backtick) on Windows/Linux
      2. Cmd + \` on macOS<br>

2. **Navigate to the Android Folder**\
   \
   Run the following command in the VS Code terminal :<br>

   ```html
   cd android
   ```

   \
   &#x20;This changes the directory to the Android folder inside your React Native project.

3. **Build the APK**\
   \
   Run the following command :<br>

   ```html
   ./gradlew assembleRelease
   ```

4. **Find the APK**<br>

   Once the build is complete, your APK will be available at:<br>

   ```html
   android/app/build/outputs/apk/release/app-release.apk
   ```

## 2. IOS

1. Open Your Xcode Project.<br>
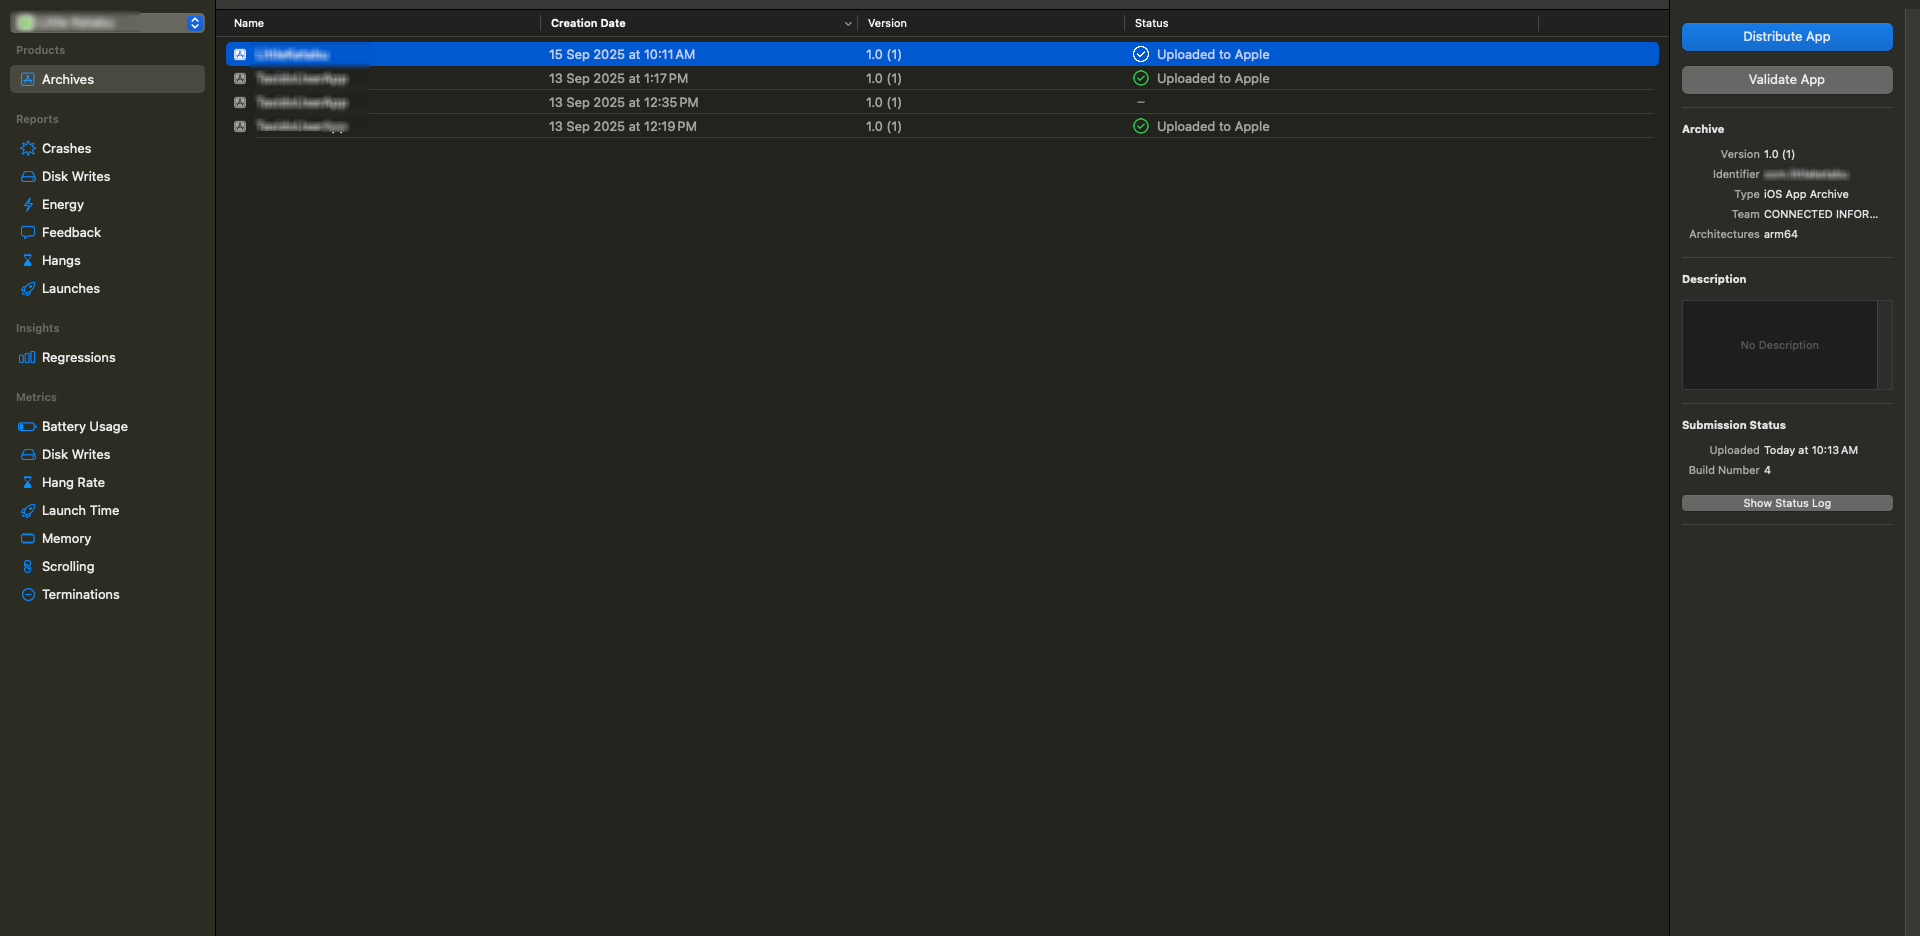
2. Click on **Product** in the top tab, and then click **Archive**<br>

   <figure><img src="https://74030740-files.gitbook.io/~/files/v0/b/gitbook-x-prod.appspot.com/o/spaces%2F6o4UzjBZtMQpeq4oeh8s%2Fuploads%2F0O1Y84VHZgVXmxu8rrtU%2Fimage.png?alt=media&#x26;token=2755fb7f-b582-4836-867e-203704e83ec9" alt=""><figcaption></figcaption></figure>
3. Wait for the Archive build to complete.
4. When the Archive build is complete, click the **Distribute App** button.<br>

   <figure><img src="https://74030740-files.gitbook.io/~/files/v0/b/gitbook-x-prod.appspot.com/o/spaces%2F6o4UzjBZtMQpeq4oeh8s%2Fuploads%2FBmWBRdyti488mns10dxs%2Fimage.png?alt=media&#x26;token=de70662d-b553-47de-a6f3-f38eebc52a62" alt=""><figcaption></figcaption></figure>
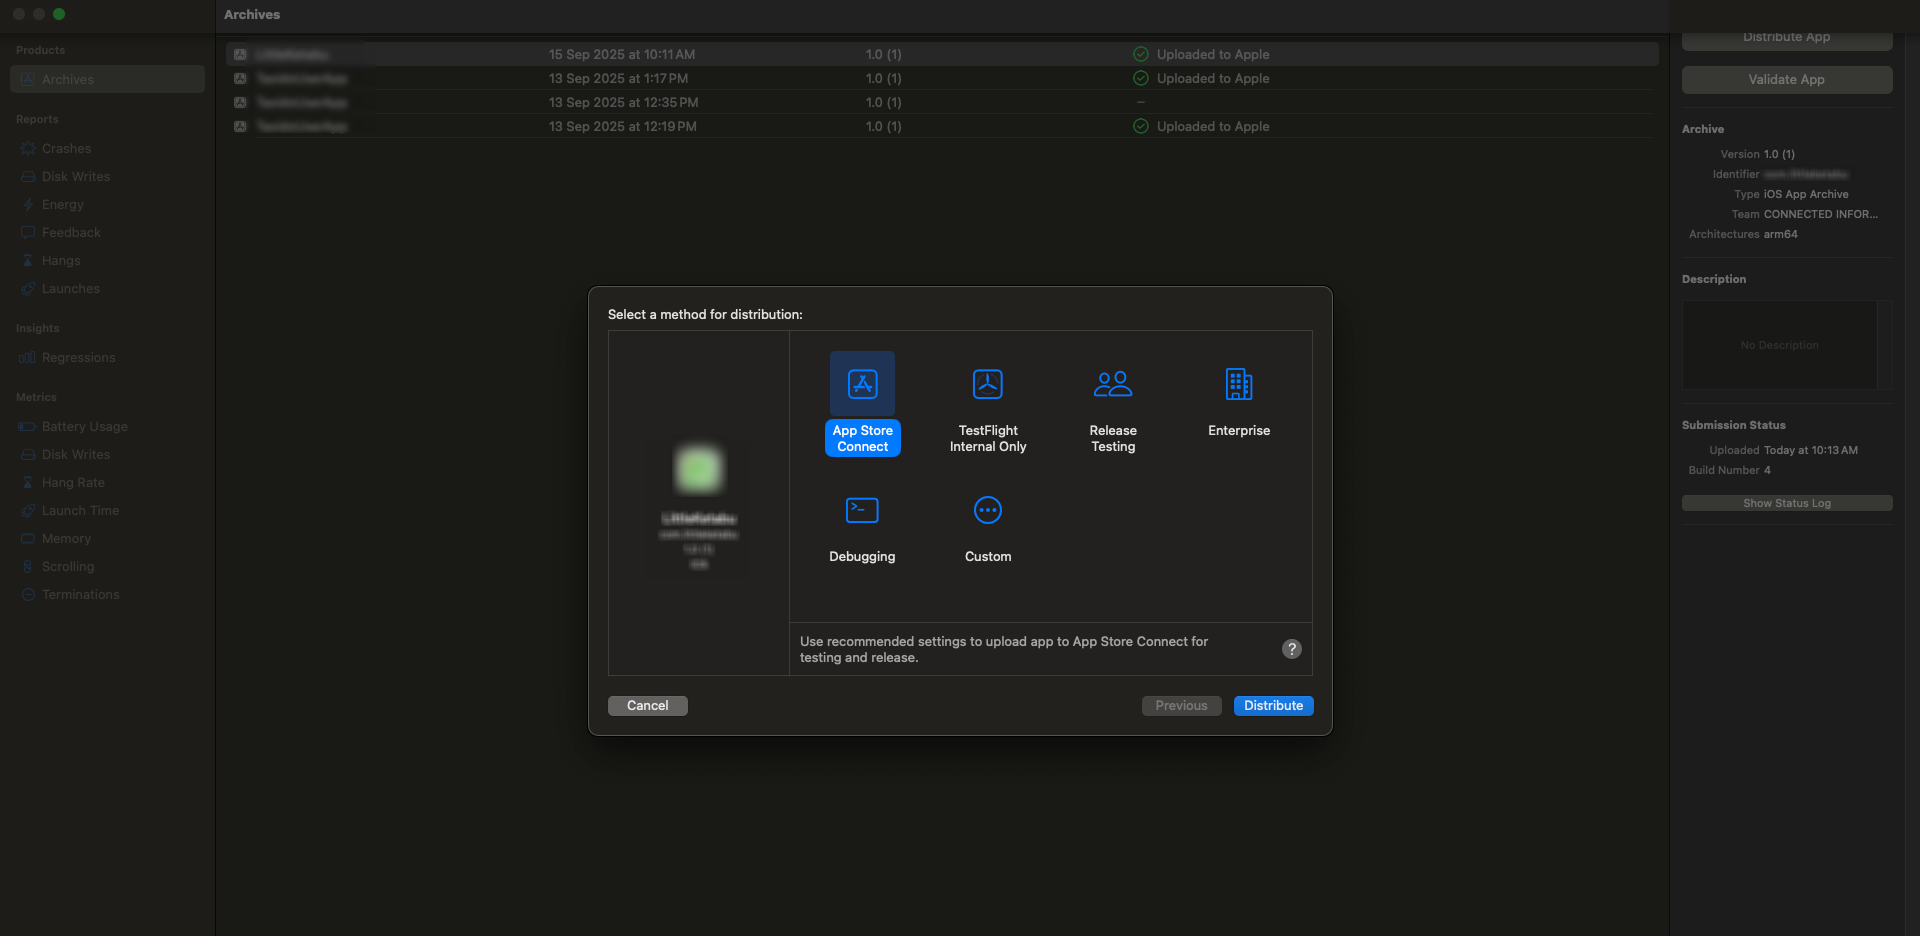
5. A dialog will open. Select App Store Connect and click Distribute.<br>

   <figure><img src="https://74030740-files.gitbook.io/~/files/v0/b/gitbook-x-prod.appspot.com/o/spaces%2F6o4UzjBZtMQpeq4oeh8s%2Fuploads%2FlUNhkojVdvcOk7dOdBfX%2Fimage.png?alt=media&#x26;token=964dcbab-580d-4a67-9a73-476384b2dc33" alt=""><figcaption></figcaption></figure>
